Connect your domain (DNS records)
The DNS records to add for your site and its e-mail, how to check them, and the Cloudflare settings that matter.
Find your records
Open your site under My sites and scroll to DNS records. Each row shows the Type, Name (host), Value and Status, with a Copy button. Add them where your domain's DNS is managed — at your registrar or at Cloudflare.
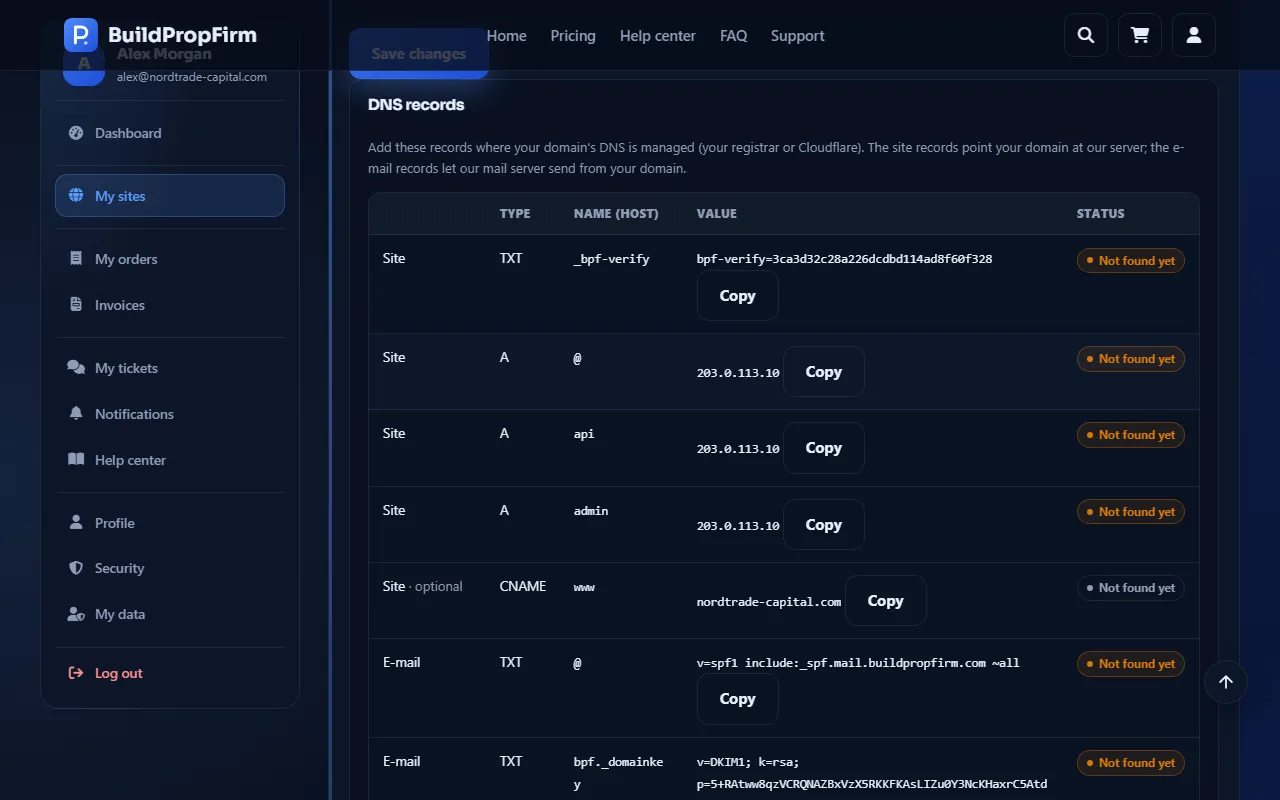
The records for your site
- TXT
_bpf-verifywith the valuebpf-verify=…shown on the page — proves you own the domain. Required. - A records for
@,apiandadmin, pointing at our server (and AAAA records too, if they are shown). Required. - CNAME
wwwpointing at your domain — optional.
Your site runs on your domain, its API on
api.and its admin panel onadmin.your domain.- TXT
Your site's e-mail
Your site sends its e-mails (sign-up, orders, payouts, notifications) through a mail provider you connect. When your site is up, open its admin panel, go to Emails → Settings, choose your provider (SMTP, Mailerino, Elastic Email or MailerLite), enter its details and send a test e-mail.
Then add the SPF and DKIM records your mail provider gives you (and optionally DMARC) to your domain, so your e-mails reach the inbox.
A domain can have only one SPF record: if you already have one (for your own mailbox), merge your mail provider's value into it instead of adding a second one.
Check your records
Click Check DNS. Each record shows Found or Not found yet. New records can take a few hours to be seen everywhere, so check again later; you can check at most once a minute.
We can approve your request once the ownership TXT record is found and
@,apiandadminpoint at our server.Using Cloudflare
- Keep
apiandadminon DNS only (grey cloud). Your site andwwwmay be proxied (orange cloud). - If your domain goes through Cloudflare's proxy, turn off Email Obfuscation and Rocket Loader.
- Set SSL/TLS to Full (strict) only after your site's certificate has been issued.
- Keep